In this blog I will explain how you can utilize the “Azure Data Lake and Stream Analytics Tools” extension in Visual Studio to locally test and develop your Azure Stream Analytics Solution.
By developing your Azure Stream Analytics Solution in a Visual Studio solution, you also have the additional benefit of including it in your source control solution for versioning control. Since the “Azure Stream Analytics Application” project type outputs an Azure Resource Manager (ARM) template, it can perfectly be included in your Azure DevOps pipeline for deployment.
Part 1: Install the extension and create the project
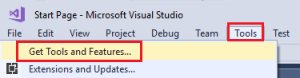
Open Visual Studio and navigate to “Tools” -> “Get Tools and Features…”:
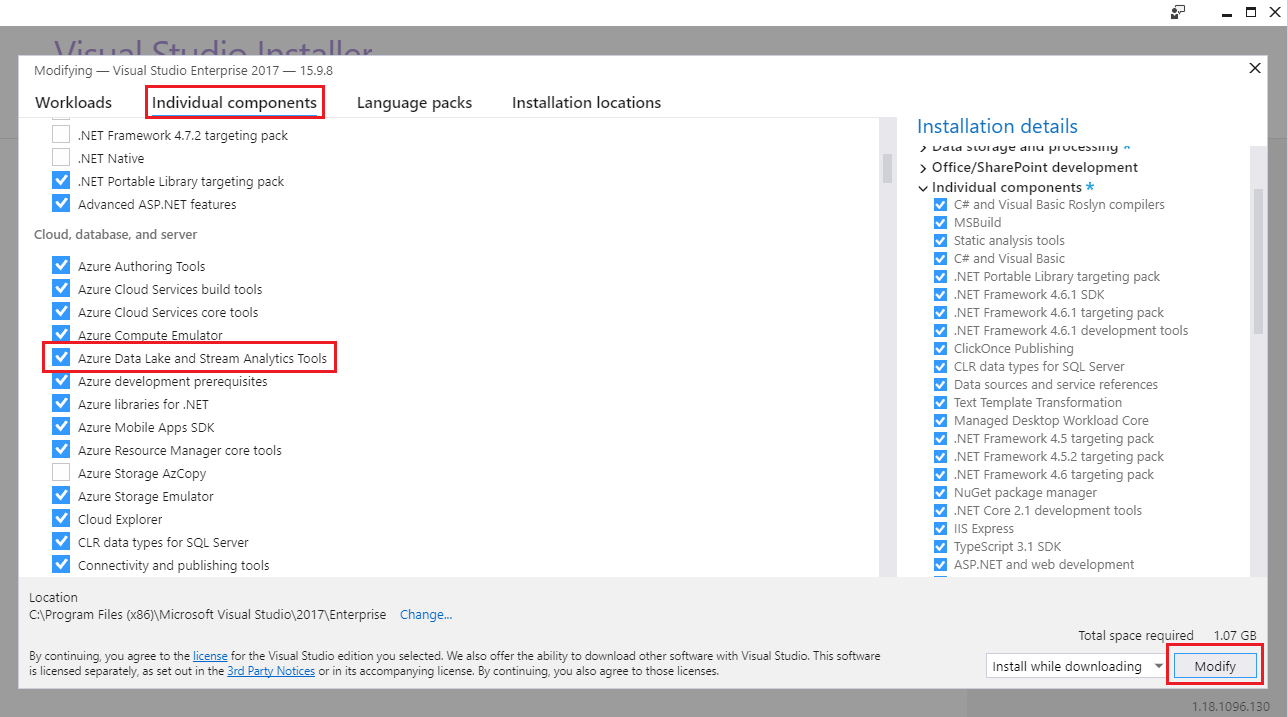
In the Visual Studio Installer screen, go to “Individual components”, select “Azure Data Lake and Stream Analytics Tools” and click [Modify]:
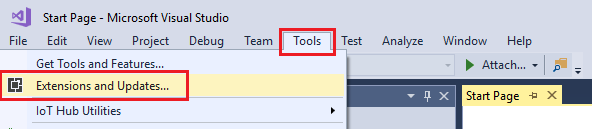
Open Visual Studio and navigate to “Tools” -> “Extensions and Updates…”:
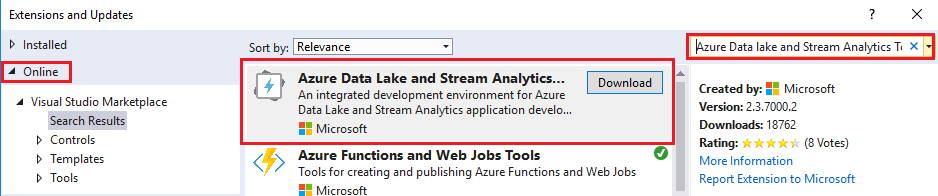
Under the “Online” section, search for the “Azure Data Lake and Stream Analytics Tools” extension, click [Download] and follow the steps to install it (if you already have it installed, make sure that you use version 2.3.7000.2):
When the installation completed, create a new project in Visual Studio using the “Azure Stream Analytics Application” template:

This will create the Stream Analytics project for you and results in the below default project structure:
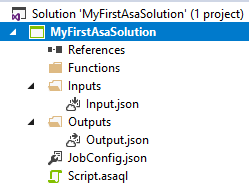
In this structure these elements are present:
- Functions: this folder will contain any custom developed functions (JavaScript Function or Machine Learning Function)
- Inputs: this folder will contain the inputs for your Stream Analytics job (stream input or reference input)
- Outputs: this folder will contain the outputs for your Stream Analytics job (e.g. SQL database, Service Bus, Event Hub)
- JobConfig.json: this json file contains the configurations for your Stream Analytics job (e.g. SU allocation, output error handling)
- Script.asaql: this file will contain your Stream Analytics query
As you can see, the project structure closely reassembles the options and settings you can configure in Stream Analytics via the Azure Portal: The “Job topology” section is covered by Functions/Inputs/Outputs/Script.asaql and the “Configure” section is covered by JobConfig.json.
Part 2: Create Inputs and Outputs
For this blog, I’ll assume you already have an EventHub and Azure SQL database available within your subscription which can be used as input and output for the Stream Analytics job.
Double click the “Input.json” file. This will open the input properties configuration screen:
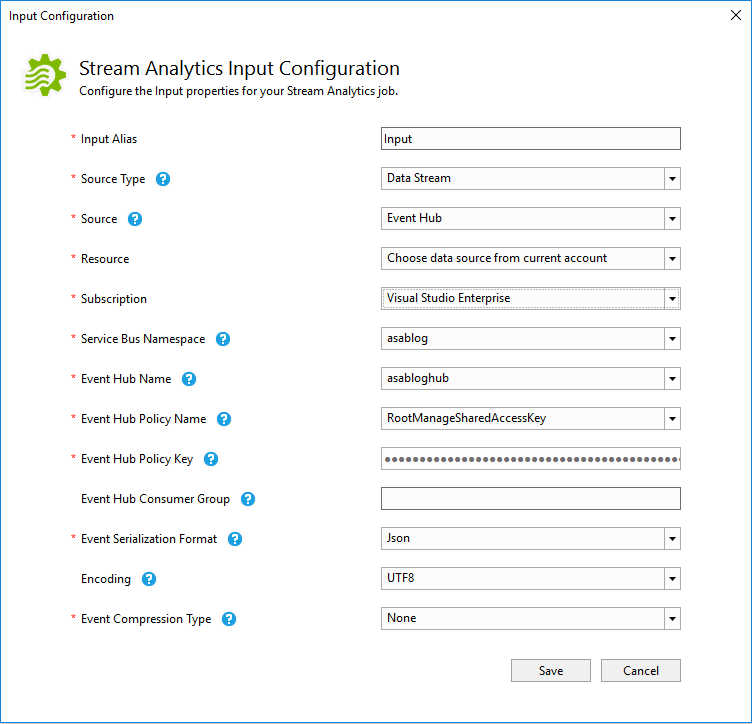
Because I already have an Event Hub available in my subscription (“asablog” / “asabloghub”), it automatically gets selected. The Policy Name and Key are automatically pre-filled.
For now I’ll leave everything to the default settings, but note that it might be useful to rename the “Input Alias” to something more relevant, especially if you will have multiple Inputs for your job.
Under the “Resource” option, you can also select the option to “Provide data source settings manually”. You can use this option if the resource you want to target is not listed or if it isn’t located under a subscription where your account has access to.
When all settings are configured, click [Save].
Double click the “Output.json” file. This will open the output properties configuration screen:
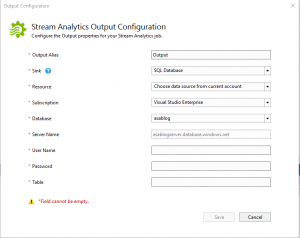
Because I already have an SQL Database available in my subscription (“asablog” / “asablogserver”), it automatically got selected when I switched the “Sink” to SQL Database. Note that there are many more options available to send your job output to based on your application architecture/requirements:
- SQL Database
- Blob Storage
- Event Hub
- Table Storage
- Service Bus Queue
- Service Bus Topic
- CosmosDB
- Power BI
- Data Lake Storage Gen1
- Azure Function
Complete the form with the username/password and the database table where the output should be stored into. Then click [Save].
Open “Script.asaql” and add the below query in there so we just read the input directly into the output (without any query modifications):
SELECT
   *
INTO
   [Output]
FROM
   [Input]
When you build the solution, it should successfully build without any errors.
Part 3: Test the solution
You now have a solution that builds in Visual Studio, but how do you test it? That’s what I’ll describe in this section.
The Stream Analytics project in Visual Studio supports different ways of testing which you can find in the “Script.asaql” file:
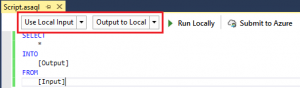
I often use the settings from the screenshot: “Use Local Input” and “Output to Local“. You can also choose to “Use Cloud Input” for which you can “Output to Local” or “Output to Cloud”. This is more a scenario if you want to test against your actual data in the Cloud.
With the Local/Local option, you can test everything locally without impacting your cloud infrastructure.
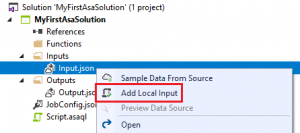
To enable local testing, the solution needs to know the input you want to use for testing. You can add this by right clicking “Input.json” and select “Add Local Input”:
This will open the “Add Local Input” configuration screen:
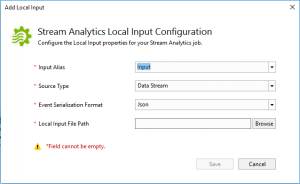
The “Input Alias” needs to be equal to the actual input for Stream Analytics job, so in this case will be “Input“.
Based on the expected data in the EventHub, I’ve created the “localinputdata.json” file with some example data:
[
    {
        "Timestamp": "2019-03-17T11:30:07.412Z",
        "EngineTemperature": 90,
        "VehicleSpeed": 55,
        "VehicleID": "Truck1"
    },
    {
        "Timestamp": "2019-03-17T12:31:09.412Z",
        "EngineTemperature": 95,
        "VehicleSpeed": 70,
        "VehicleID": "Truck1"
    },
    {
        "Timestamp": "2019-03-17T13:30:09.412Z",
        "EngineTemperature": 96,
        "VehicleSpeed": 30,
        "VehicleID": "Truck2"
    },
    {
        "Timestamp": "2019-03-17T13:31:10.412Z",
        "EngineTemperature": 88,
        "VehicleSpeed": 65,
        "VehicleID": "Truck3"
    }
]
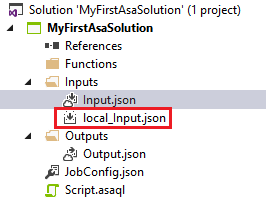
This is the file which I’ve selected as “Local Input File Path”. After clicking [Save], you’ll see that “local_Input.json” is now added to the solution:
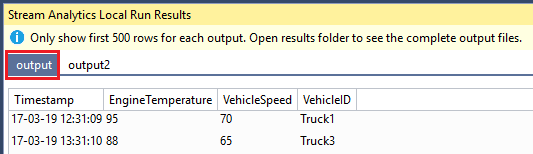
When you open “Script.asaql” and click [Run Locally] (with the Local to Local option), a local Stream Analytics instance will be started in a command prompt and the output will be shown in the Visual Studio “Stream Analytics Local Run Results” window:
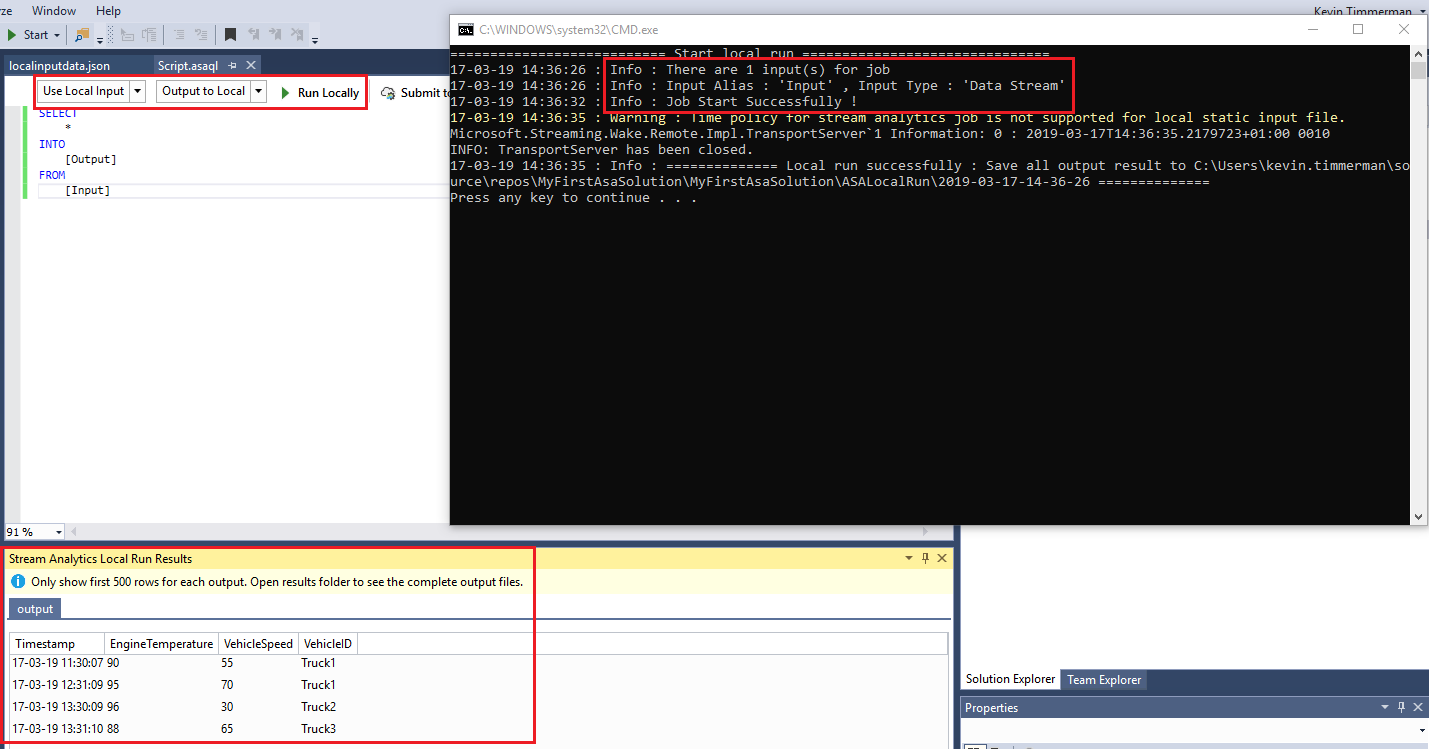
The command prompt window will show any issues you might have with your query and will show where all the results are stored on your local drive.
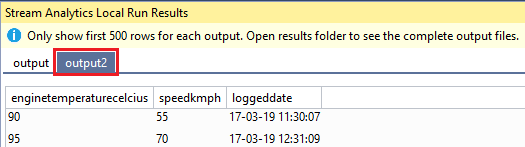
If you modify the query, you’ll see that the output will also change and when you have multiple outputs, it will create multiple tabs:
SELECT
    *
INTO
    [Output]
FROM
    [Input]
WHERE
    [VehicleSpeed] > 55

SELECT
    [EngineTemperature] AS [EngineTemperatureCelcius],
    [VehicleSpeed] AS [SpeedKmph],
    [Timestamp] AS [LoggedDate]
INTO
    [Output2]
FROM
    [Input]
WHERE
    [VehicleID] = 'Truck1'
Because there are two outputs present (Output and Output2) there will be two tabs to view the respective output data:
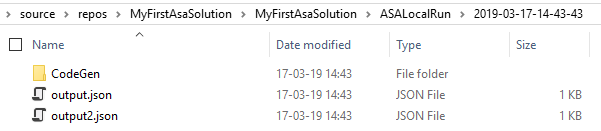
If you’re interested in the full output (if you have more than 500 output rows) or in the outputted JSON files, you can find them on your local drive as listed in the command prompt:
For now, we’ll revert the query back to simple SELECT * INTO [Output] FROM [Input] to be ready for part 4.
Part 4: Deploy the solution
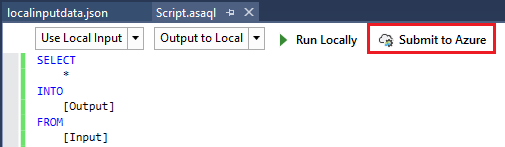
We now have a locally tested and working solution which we want to deploy to Azure. This is also possible directly from Visual Studio via the [Submit to Azure] option in the “Script.asaql” file:
This opens the “Submit Job” window where you can deploy to an existing Azure Stream Analytics job or to a new one. We will deploy to a new job with below details:
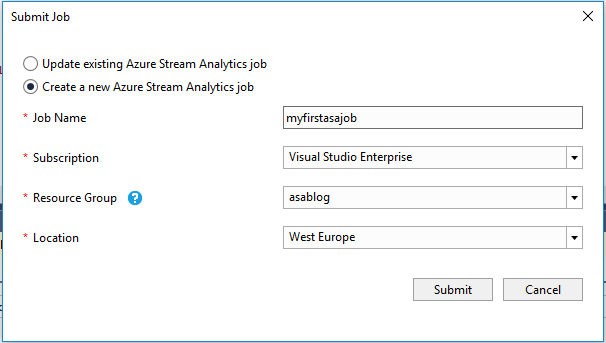
Click [Submit] and the Stream Analytics job will be deployed to Azure.
After the deployment is completed, you can manage it from within Visual Studio:
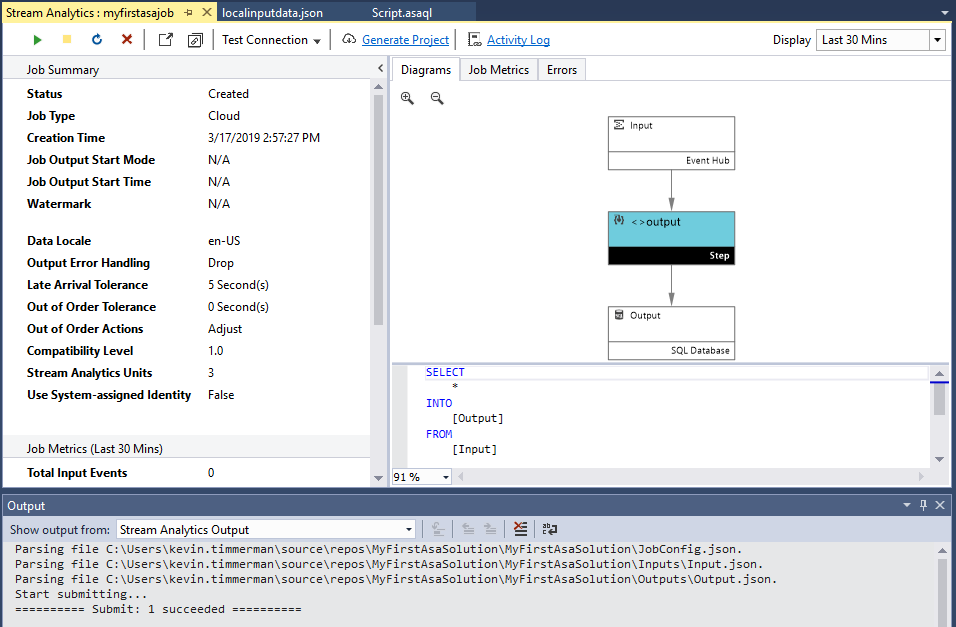
To open de Stream Analytics job in the Azure Portal, click the “Open in Azure Portal” link:

Part 5: Include the solution into Azure DevOps
Another nice feature of the Stream Analytics project in Visual Studio is that, after building the project, it generates the Azure Resource Manager (ARM) Template you can use to deploy Stream Analytics from your Azure DevOps pipeline (or other deployment scripts).
The ARM Template and the ARM Template Parameters file are located under the “bin\Debug\Deploy” folder of your project:

Most of the settings in the ARM Template are parameterized (and defaulted to the settings as per your solution) so that you can easily change them in your CI/CD Pipeline. A snippet of the “resources” section of the ARM template:
  "resources": [
    {
      "type": "Microsoft.StreamAnalytics/StreamingJobs",
      "apiVersion": "[parameters('ASAApiVersion')]",
      "name": "[parameters('StreamAnalyticsJobName')]",
      "location": "[parameters('Location')]",
      "properties": {
        "outputStartMode": "[parameters('OutputStartMode')]",
        "outputStartTime": "[if(equals(parameters('OutputStartMode'),'CustomTime'), parameters('OutputStartTime'), json('null'))]",
        "sku": {
          "name": "standard"
        },
        "jobType": "Cloud",
        "eventsOutOfOrderPolicy": "[parameters('EventsOutOfOrderPolicy')]",
        "outputErrorPolicy": "[parameters('OutputErrorPolicy')]",
        "eventsOutOfOrderMaxDelayInSeconds": "[parameters('EventsOutOfOrderMaxDelayInSeconds')]",
        "eventsLateArrivalMaxDelayInSeconds": "[parameters('EventsLateArrivalMaxDelayInSeconds')]",
        "dataLocale": "[parameters('DataLocale')]",
        "compatibilityLevel": "[parameters('CompatibilityLevel')]",
The above section contains the name of the job and the settings which are configured in the “JobConfig.json” file.
The below screenshot contains the inputs and outputs for the stream analytics job, with their respective settings. If you have more inputs or outputs those will be generated as well:
        "inputs": [
          {
            "name": "Input",
            "properties": {
              "type": "Stream",
              "datasource": {
                "type": "Microsoft.ServiceBus/EventHub",
                "properties": {
                  "serviceBusNamespace": "[parameters('Input_Input_serviceBusNamespace')]",
                  "eventHubName": "[parameters('Input_Input_eventHubName')]",
                  "consumerGroupName": null,
                  "sharedAccessPolicyName": "[parameters('Input_Input_sharedAccessPolicyName')]",
                  "sharedAccessPolicyKey": "[parameters('Input_Input_sharedAccessPolicyKey')]"
                }
              },
              "compression": {
                "type": "None"
              },
              "serialization": {
                "type": "Json",
                "properties": {
                  "encoding": "UTF8"
                }
              }
            }
          }
        ],
        "outputs": [
          {
            "name": "Output",
            "properties": {
              "serialization": {
                "type": "Json",
                "properties": {
                  "encoding": "UTF8",
                  "format": "LineSeparated"
                }
              },
              "datasource": {
                "type": "Microsoft.Sql/Server/Database",
                "properties": {
                  "server": "[parameters('Output_Output_server')]",
                  "database": "[parameters('Output_Output_database')]",
                  "user": "[parameters('Output_Output_user')]",
                  "table": "[parameters('Output_Output_table')]",
                  "password": "[parameters('Output_Output_password')]"
                }
              }
            }
          }
        ],
The last section of the ARM Template covers the query and the functions. Since we didn’t use any functions in this example, that section contains an empty array:
        "transformation": {
          "name": "Transformation",
          "properties": {
            "streamingUnits": "[parameters('StreamingUnits')]",
            "query": "SELECT\r\n    *\r\nINTO\r\n    [Output]\r\nFROM\r\n    [Input]"
          }
        },
        "functions": []
Note that in the generated parameter file for the ARM Template, all passwords and keys are left empty. Those need to be filled in manually (although that is not a very secure practice) or be filled from your CI/CD pipeline in combination with KeyVault (the secure solution).
Summary
The Visual Studio solution I’ve used in this blog can be downloaded >HERE<. As mentioned earlier, creation of the EventHub and Azure SQL Database is not included. Those need to be created manually, but won’t be actually used as we’re testing locally with the json file which is included into the solution package (“localinputdata.json“).
I hope this blog post helps you in getting started with creating your Azure Stream Analytics solution from Visual Studio and allowing you to locally develop and test the solution, compared to online testing which takes a lot of time because you need to stop and start the job continuously and upload the input files there. By developing it from Visual Studio, you also benefit from the option to push your project into a source control system (like Git) and into a build and release pipeline like Azure DevOps to automatically build and deploy your Stream Analytics solution through your application’s DTAP architecture.